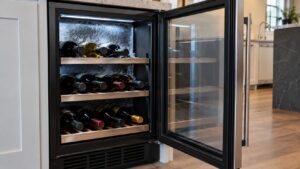

A U-Line wine cooler that runs longer than it used to, feels warm to the touch on the outside, or struggles to hold its set temperature is often dealing with a dirty condenser rather than a failing compressor. The condenser is the coil, usually located near the compressor at the bottom or rear of the cabinet, that releases heat pulled out of the wine storage area. When it’s coated in dust, pet hair, or kitchen grease, it can’t shed heat efficiently, and the whole cooling system has to work harder than it should.
Signs your U-Line wine cooler condenser needs cleaning
A few patterns point specifically toward a dirty condenser rather than another type of problem:
- Warmer-than-normal cabinet temperature even though the compressor seems to be running frequently.
- Longer, more frequent compressor run cycles as the system compensates for reduced heat rejection.
- Warm air blowing from the base vents that feels noticeably hotter than usual.
- Visible dust or lint built up on the front grille or vent openings, which is often a sign of what’s accumulated on the coil behind it.
- Location near a dusty or greasy environment, such as a kitchen with a lot of cooking activity or a unit installed near a laundry area.
What you can check and clean yourself
Unplug the wine cooler before doing any cleaning, and let it sit for a few minutes if it’s been running so the condenser area isn’t uncomfortably warm.
- Locate the front toe-kick grille or rear access panel, depending on the model’s condenser location, and remove it according to how it’s secured.
- Use a vacuum with a soft brush attachment to gently remove loose dust and debris from the coil fins and surrounding area.
- For finer buildup, a soft-bristle brush can help loosen dust before vacuuming it away — avoid using anything stiff or metallic that could bend the thin coil fins.
- Check that the surrounding area, including any fan blades near the condenser, is also free of dust buildup.
- Confirm nothing is blocking airflow into or out of the ventilation area once the panel is replaced, including nearby cabinetry or stored items.
- Plug the unit back in and monitor whether run cycles shorten and the interior temperature stabilizes over the next day.
How often condenser cleaning should happen
There’s no single interval that fits every installation, since how quickly a condenser gets dirty depends heavily on the surrounding environment. A unit installed in a busy kitchen near cooking activity will accumulate grease-laden dust faster than one in a quieter bar area, and homes with pets typically see more lint and hair buildup around any ventilation opening. Rather than waiting for symptoms like longer run cycles or warmer performance to appear, checking the condenser area every few months as part of routine kitchen maintenance can catch buildup before it starts affecting how efficiently the unit runs.
When to call a technician
Routine condenser cleaning is one of the few maintenance tasks an owner can typically handle safely, since it doesn’t involve opening the sealed refrigerant system or touching electrical components directly. But if cleaning the condenser doesn’t improve performance, or if you notice oily residue near refrigerant lines, unusual compressor noise, or ice forming somewhere it shouldn’t, those are signs of a deeper issue that needs a technician. Sealed-system work, refrigerant handling, and compressor diagnostics all require specialized tools and should never be attempted as a DIY project.
Building a regular cleaning schedule, especially for units installed in built-in cabinetry with limited airflow, is the simplest way to prevent condenser buildup from becoming a recurring issue.
Getting your U-Line wine cooler fixed for good
Working through the points above resolves many cases on a wine cooler. If the problem behind “U-Line Wine Cooler Condenser Needs Cleaning: Signs and Fixes” persists after you have tried the safe checks here, an experienced U-Line technician can pinpoint the exact cause and complete the repair with genuine parts. On built-in refrigeration, a small problem caught early usually means a smaller repair and less risk to what is stored inside. Our specialists focus on U-Line wine coolers specifically, so diagnosis is faster and repeat visits are rarer.
For help with “U-Line Wine Cooler Condenser Needs Cleaning: Signs and Fixes,” our U-Line specialists are ready. We give honest, diagnosis-based pricing and back completed work with a labor guarantee — never a fixed price sight unseen. Schedule a technician, browse our troubleshooting guides, or look up your model in the directory.
U-Line wine coolers are built and documented by the manufacturer in Milwaukee. For official specifications and owner documentation, visit the manufacturer at u-line.com.