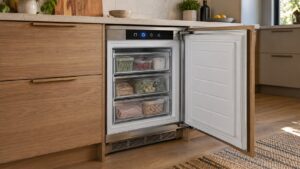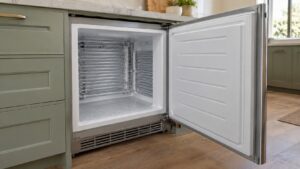

This guide covers U-Line Built-In Freezer Door Reversal with practical, technician-backed advice.
Getting a U-Line built-in freezer properly leveled and, if needed, reversing its door swing are two of the most common installation-stage tasks owners run into, particularly when a kitchen layout calls for the door to open in a different direction than the unit ships in. Both tasks are manageable with basic tools and patience, but they benefit from a methodical approach since a freezer that’s slightly off level or has a door reversed incorrectly can cause sealing and alignment problems down the road.
Understanding the U-Line Built-In Freezer Door Reversal
Below, our specialists break down everything you need to know about the U-Line Built-In Freezer Door Reversal.
Why leveling matters before anything else
A built-in freezer needs to sit level for its door to seal evenly, its cooling system to circulate air the way it’s designed to, and its soft-close hardware to function properly. Before touching the door, confirm the cabinet opening itself is level and that the flooring or riser beneath it hasn’t settled unevenly. Use a bubble level across the top of the unit in both directions — side-to-side and front-to-back — and adjust the leveling feet, typically located at the front corners of the base, until the unit reads level in both planes. It’s worth rechecking level after the unit has been in its final position for a day or two, since built-in cabinetry and flooring can settle slightly once weight is fully in place.
Preparing for a door reversal
Not every U-Line freezer model supports field door reversal, so the first step is confirming your specific model’s installation documentation permits it before proceeding. If it does, unplug the unit and remove any items from the door before starting. Door reversal generally involves removing the top and bottom hinge assemblies, taking the door off its current side, and remounting the hinge hardware on the opposite side of the cabinet, along with relocating the door handle if applicable. Keep track of every screw and hinge pin as you remove them, since hardware is often model-specific and not interchangeable between sides without care.
Reinstalling the door and checking alignment
Once the hinges are remounted on the new side, rehang the door carefully, making sure the hinge pins seat fully before letting go of the door’s weight. With the door back on, check that it swings freely through its full range without catching on the cabinet frame or surrounding trim, and confirm the gasket makes even contact around the entire frame when closed. This is a good time to run the dollar-bill test at multiple points around the door perimeter to confirm consistent gasket pressure.
Final leveling and seal check
After a door reversal, recheck the unit’s level one more time, since the process of removing and remounting hardware can occasionally shift the cabinet slightly if it wasn’t fully secured beforehand. Open and close the door several times to confirm the soft-close mechanism engages smoothly and pulls the door into a fully seated position on the new hinge side. If the door doesn’t sit flush or the soft-close action feels uneven after reversal, revisit the hinge mounting before considering the installation complete, since a door that isn’t properly aligned after reversal can develop sealing problems that are harder to diagnose once the unit is in daily use.
It’s worth planning door reversal work for a time when you can complete the full process in one session rather than leaving the door partially reassembled, since a freezer left open or with hardware only partly reinstalled will lose temperature control and put stored food at risk. Have all necessary hardware, including any replacement screws specified in your model’s documentation, on hand before starting so the job isn’t interrupted partway through.
If at any point during reversal the hinge hardware doesn’t seem to fit the new side the way the documentation describes, stop and consult the installation manual again rather than forcing components into place, since forcing misaligned hardware can damage the door or cabinet in ways that are more difficult to correct afterward than simply pausing to double-check the process.
Once the reversal is complete and the door is functioning correctly, it’s worth giving the unit a few days of normal use before considering the job fully finished. Watch for any signs that the door isn’t sealing as tightly as it should, or that the soft-close mechanism doesn’t feel as smooth as it did on the original hinge side, since minor issues sometimes only become apparent after the door has been opened and closed many times under real-world conditions rather than during a brief test immediately after reassembly.
U-Line freezers are built and documented by the manufacturer in Milwaukee. Original documentation for these units is available from the manufacturer, u-line.com.